By Sertalp B. Cay | January 5, 2019
Linux is arguably the most developer-friendly operating system. From automation to feature-rich text editors, I see Linux as a must for any programmer. Powerful and hackable Linux ecosystem and the huge community make finding solutions to common problems very trivial.
If you need to use Windows for a variety of reasons, you are not out of options when it comes to using Linux. Over the years, I have tried a lot of different ways to enable Linux functionality on Windows, some are better than others but all of them have specific use cases. Windows 10 started supporting Linux subsystem natively a while ago which is called Windows Subsystem for Linux (WSL). WSL basically enables you to run Linux executables on Windows 10, natively. In this blog post, I will show how you can enable the Linux subsystem support on Windows 10, install Ubuntu and do some customization without an arm and a leg.
Alternatives
Before I start, let me point out two different methods that you can use instead of WSL.
- Cygwin is a tool that provides Linux-like functionalities on Windows. It is an emulator hence there are lots of restrictions, but it is my to-go choice for basic Linux functionalities.
- VirtualBox, VMWare Workstation and similar programs help you to run a guest operating system on your machine (host). They often provide more functionalities than other alternatives, since you actually run an actual OS on your machine. For example, you can easily use a graphical user interface with them or make them boot with your system. I use VirtualBox for my home server (TeamSpeak, Dokuwiki, etc..) for quite some time and am very happy with its reliability so far. But I find WSL to be enough for most of my programming work.
The real advantage of using WSL is to access Linux functionality without paying the cost of hosting a full OS which uses lots of resources to make it happen.
Installing Windows Subsystem for Linux
Installing WSL is very, very easy.
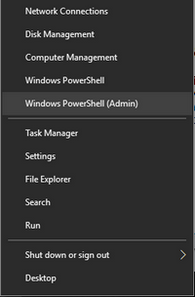
Right-click on Windows Start button and choose Windows PowerShell (Admin).
In PowerShell, simply run the following command:
Enable-WindowsOptionalFeature -Online -FeatureName Microsoft-Windows-Subsystem-Linux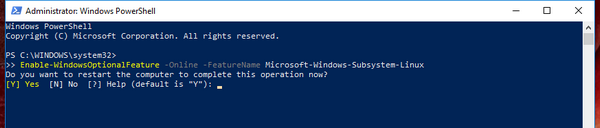
Voila! You have enabled WSL on your system. You may need to restart your PC at this point.
Now, it’s time to install a Linux version.
Installing Linux Distributions
You can download Ubuntu from Microsoft Store.
Simply type Microsoft Store on your Start Menu and search for the Linux distribution of your choice such as Ubuntu.
If you prefer command line, use PowerShell in admin mode and run the following code. This command will download the Ubuntu from Microsoft Store and then run the installer.
Invoke-WebRequest -Uri https://aka.ms/wsl-ubuntu-1804 -OutFile Linux.appx -UseBasicParsing; .\Linux.appx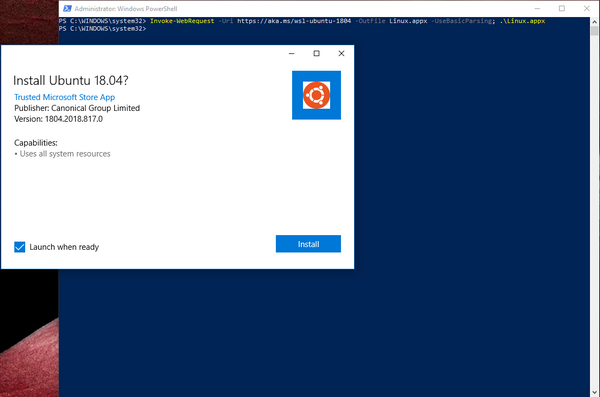
Replace -Uri parameter with Linux distribution of your choice.
A list of Linux distros are available at Microsoft’s website.
Here is a list of available distros as of writing this post:
| Distro | Link |
|---|---|
| Ubuntu 18.04 | https://aka.ms/wsl-ubuntu-1804 |
| Ubuntu 18.04 ARM | https://aka.ms/wsl-ubuntu-1804-arm |
| Ubuntu 16.04 | https://aka.ms/wsl-ubuntu-1604 |
| Debian GNU/Linux | https://aka.ms/wsl-debian-gnulinux |
| Kali Linux | https://aka.ms/wsl-kali-linux |
| OpenSUSE | https://aka.ms/wsl-opensuse-42 |
| SLES | https://aka.ms/wsl-sles-12 |
You will instantly see the Linux console opens after the installation. It will ask you for a username and a password. Linux console will open with this default username from now on. The password is only asked when you want to perform an admin (sudo) command.
Now you should have a Linux terminal on your Windows machine. How cool is that? Before you dive into the Linux ocean, I have some quick tips for you below.
Tips and further settings
I have installed Ubuntu on my machine, so some of the settings might differ if you are using a different distro.
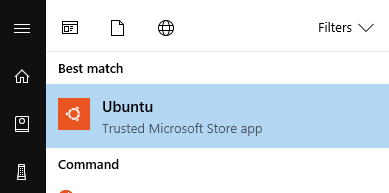
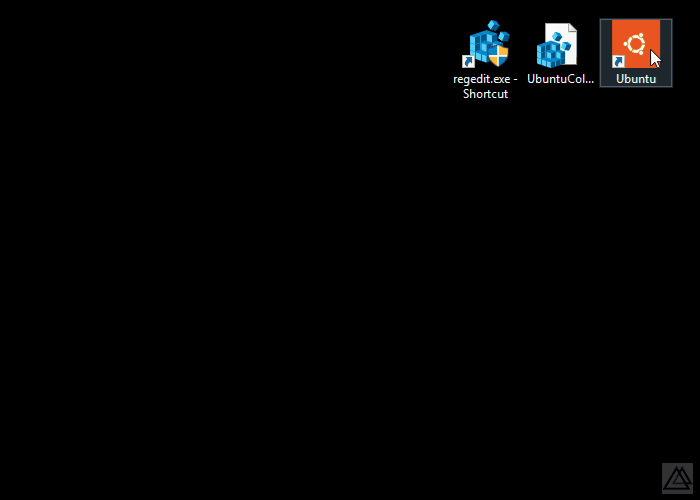
After the installation, you should be able to search Ubuntu on your Start Menu and see the icon.
Terminal colors
Probably the most difficult step you will face today is changing the terminal colors. Default terminal colors are just.. ugly. Changing them to popular choices like Solarized, Monokai, or default Ubuntu terminal colors requires some heavy lifting.
James Garijo-Garde wrote about changing WSL colors to default Ubuntu colors.
You essentially need to change 16 colors on the Properties menu one by one.
If you want, you can use a Regedit file to import colors at once to your Registry. The tricky part is that your Ubuntu might be at a different location. Therefore, you need to change a setting to create a Registry entry, and use the name of the console. Here are the four steps you need to follow:
- Go to
Propertiesmenu,Colorstab and change a single color –does not matter which one– and save it.
(This step will make sure that you have a Registry entry for the console) - Run the .reg file (link to the repository is below).
- Go to Registry Editor (Windows + R,
regedit) and navigate toHKEY_CURRENT_USER\Console - Copy name of your Ubuntu editor, delete the entry, and replace the name
ReplaceNameWithUbuntuwith the name you copied.
See the gif below:
Registry file is on my Github repository.
Disabling the bell (beep) on Linux
Tab completion beep on Linux terminal is one of the most annoying sound known to humankind. Although it serves a purpose, you may soon get irritated during long working sessions or listening your favorite workout mix in the background.
You need to open /etc/inputrc file and uncomment the line set bell-style none.

After uncommenting the line, restart the terminal and you will no longer hear the beep sound.
Increasing the buffer size
If you right click on the title bar and click Properties you may further customize your terminal.
One thing that you will find valuable is to increase the buffer size, so that you can scroll back to your recent commands and output.
Go to Layout tab and change the Heightvalue under the Screen Buffer Size settings.
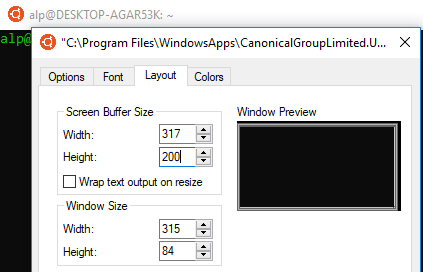
Also enable QuickEdit mode option under the Options tab to be able to copy text by selecting them and right-clicking.
Accessing the Windows username
You have access to Windows Command Line using cmd.exe command even if you are working inside the Linux terminal.
Using cmd.exe you can do lots of things, like accessing the Windows username.
Adding
export USERNAME="cmd.exe /c echo %USERNAME%"to your .bashrc file enables $USERNAME variable on Linux terminal.
Accessing the Windows username may come handy when writing scripts.
Changing the username
If you need to change the default username when you open the Ubuntu terminal, use
ubuntu config --default-user new_usernameon PowerShell as an admin.
Accessing Windows folders
Your Windows folders should be accessible under /mnt folder.
Simply navigate to your desktop using
cd /mnt/c/Users/your-username/Desktop/Creating a shortcut
Windows does not provide an option for creating a shortcut when you right-click on store apps on Windows 10. The trick is to find the app on Start Menu and simply drag the app and drop it on the desktop.
End
So, that’s all folks. I hope you are happy with your brand new Linux terminal. Leave a reply below (or make a merge request) if you have a useful tip on mind that can be added here.
Happy new year!
